(386) 263-7906 floridasbestroofing@gmail.com
Roofing Blog

Asphalt Shingle Packaging, Transport, and Delivery: Part II

In our previous post we covered the in and outs of asphalt shingle packaging and the shingle transport process. We explained why it is too taxing in time, space, and manpower for most roofing companies to store and transport all the shingles and other supplies to each job site themselves. Asphalt shingles, in the amounts it takes to cover an average roof, are too bulky and heavy for it to be efficient for every contractor to store them in their own facilities and load them onto every roof they install or replace. Operating more efficiently and deferring storage and delivery costs lowers service prices and saves money for customers and consumers in the long run. 

As mentioned in the last post, there is a system of supply companies in place with the infrastructure and equipment to handle the logistics of shingle storage, transport, and delivery. Roofing supply companies are generally either national or regional companies that deal with dozens or even hundreds of roofing contractors and can efficiently handle the volume of that work. Each supply company’s regional office buys materials in bulk from manufacturers to temporarily store at their location. Roofing contractors submit orders to a local supplier’s office for delivery. 

Most deliveries are destined for a specific job site, which are submitted by the contractor to the supplier. Occasional deliveries are also scheduled for contractors’ offices. These are lower in frequency and contain items that need to be on hand daily for repairs and emergencies, like different types of vents, nails, flashing, small amounts of shingles in various colors, and other such supplies. 

Deliveries to job sites are scheduled for a specific day by the contractor, but they are organized by the supplier. Ideally the date is convenient for the property owner, fits well into the contractor’s schedule, and matches the supplier’s schedule and material availability. Ideal situations are, unfortunately, fairly rare, so there is always some compromise and give-and-take. For this reason, although it is desirable for shingles to be delivered to the roof the morning of the day on which they will be installed, occasionally the delivery date may be a day or longer from the installation date. The installation date can be delayed due to weather, the contractor’s schedule, or homeowner’s preference since shingle installation is a loud and disruptive process. Material availability, which has been particularly adversely affected by the COVID-19 pandemic, can also delay delivery dates, especially if a property owner is intent on a specific color or shingle variety. 

Once the delivery date is set, the supplier analyzes all the deliveries they have to make that day, the locations of the deliveries, and the landscapes of these locations. Landscapes can factor into how deliveries are to be made and which trucks can be used due to distance between houses and other structures, types of driveway, locations of trees and shrubs, and other elements of this sort. Materials are organized by geographical area and truck. Several trucks go out each day to make a number of deliveries, depending on order size. Often, each truck will be loaded once for a morning delivery and another time for an afternoon delivery. 

There are two types of delivery: roof-top and ground. Each one is exactly what it sounds like. In ground delivery, the shingles are simply removed from the truck and left on the ground near the property, usually on pallets, either on the driveway or the lawn near the house. In cases like these, the roofers are the ones who later haul the shingles up to the roof, often using ladders and an assembly-line system. As discussed previously, this is not ideal since it is time consuming and labor intensive. The reason for ground drop can be one of many, but all really boil down to the delivery truck being unable to get close enough to the house for roof-top delivery. The trucks are very large, so if there are other buildings very close by or trees or other elements in the way, the supply company may decide it is not safe to do anything but ground drop. This is also done if the driveway is blocked by something immovable (like a broken-down car or a storage container) or if the driveway is covered in paving stones, which can look great but most often cannot handle the weight of a shingle delivery truck. Ground drops are usually ok (not preferable) for one story buildings, but cause a lot of problems with taller structures and can result in price increases to compensate for time and labor.

Roof-top delivery is the better and more frequently utilized option for contractors and suppliers. There are two types of trucks capable of roof-top delivery: trucks equipped with conveyor belts and trucks with boom-cranes. Trucks with conveyors must be loaded, usually one bundle at a time, from the ground and unloaded on the roof. The conveyor carries one bundle at a time up to the roof, where they are stacked by employees and arranged in a way convenient for the installers later. Boom trucks use a crane and forklift system to carry shingles up to the roof one pallet at a time. The pallets are then unloaded on the roof and shingles are arranged for the installers. Which of these two types of truck is used is determined by the landscape around the house and the shape of the roof. 

Once the shingles are delivered, it’s time to get to work. If you need work on your roof or have any questions about shingle delivery or want a free estimate for your roof in the Palm Coast, Flagler, or Volusia area, please give Florida’s Best Roofing a call at 386-263-7906!

Asphalt Shingle
Uncategorized

Asphalt Shingle Packaging, Transport, and Delivery: Part I

Unless you work in the industry or have had your roof replaced at least once before, you may never have thought about the logistics behind the transportation and delivery of roofing materials. If you live in the Flagler-Palm Coast area, however, you are bound to have seen at least a few times large flat-bed shingle delivery trucks on the road or houses under construction or renovation sitting with piles of shingles, and occasionally other roofing materials, on their roof waiting for the roofers to come and finish the job. 

If you do enter the process of replacing your roof, as your roof replacement date approaches, you will likely get a call from your contractor with two dates: the shingle delivery date and the work-start date. This may be the same day, but it may also be two different days, likely in the same week. You may wonder why this is the case. Don’t the roofers just carry the shingles up to the roof when it is time to lay them? The answer is no, in most cases they do not. In this post and the next we will explain the logistics behind the asphalt shingle delivery process, from packaging to transport to the piles you see on top of a house that is about to get a new roof.


Packaging

The reasons behind the fact that asphalt shingles are delivered to a house and installed on the roof by different groups of people, and sometimes on different dates, begin with shingle packaging and weight. Shingles are sold in units called bundles. Now, a single bundle of shingles weighs about 50-80 pounds. The reason for the range is that there are different types of shingles, as we have discussed previously. Thicker and more durable shingles will up the weight of a bundle. 

Fifty to eighty pounds is pretty heavy, but not so heavy that it cannot in most cases be carried up to a roof by one worker. The question is, how many bundles are needed to cover one roof? This, obviously, depends on roof size. Unlike shingles, measured in bundles, roofs are typically measured in roofing squares. One roofing square (1 SQ) is equal to 100 square feet of roof surface. A 2,000 square foot house (including garage), which is pretty average for the Palm Coast area, typically has a 30 SQ roof. This number may vary based on how cut a roof is–how many sub-roofs and special features it has–but we will stick with a 30 SQ roof in this example. 

So, how many bundles does it take to cover the roof of a 2,000 square foot home? Well, it typically takes 3 bundles of shingles to cover 1 SQ of roof. This number may go up to four with very thick and durable shingle variants. But, say we stick with the average 3 bundles per square. This means that 90 bundles of shingles are needed to cover a 2,000 square foot house. The weight of the entire shingle delivery will be from 4,500 to 7,200 pounds. Keep in mind this is only shingles, not including the other roofing materials like underlayment, flashing, vents, nails, tools etc… While it is reasonable that a worker can carry a bundle of shingles up to a roof, 90 bundles becomes much more taxing in terms of time and manpower. This is especially the case if the house is greater than one story. 


Transport

A full shingle order for any one roof is not only heavy, but also takes up quite a bit of space. Since even a small, local roofing contractor will typically replace several roofs in a week, it is unreasonable to expect that they will be able to store and transport all the necessary orders themselves. For this reason, shingles (and other roofing supplies) are usually purchased from regional or national supply companies who store the materials in large warehouses and get them directly from the manufacturers in bulk. 

These supply companies own specialized fleets of freight, flatbed, and shingle delivery trucks which are used to transport several orders at once. Roofing contractors place shingle orders in advance with the supplier. The orders are typically broken up by job/contract. These can range from a 90 bundle order for that typical 2,000 square foot residential home to very large orders for big commercial or residential complex projects that can be hundreds of bundles at once. 

The contractor provides their chosen supply company with a delivery address for each order. The supplier’s fleet transports these orders and delivers them not to the contractor, but to each job site directly. The large flatbed trucks that are used to transport shingles, in most cases, can hold several orders at once. For this reason, several orders (from several contractors) are loaded onto each truck and grouped by geographic area for delivery. Each truck, then, makes several deliveries per day to assigned job sites. 

The delivery process, with helpful relevant information for homeowners, will be covered in our next post. In the meantime, if you have any questions about shingle delivery or want a free estimate for your roof in the Palm Coast, Flagler, or Volusia area, please give Florida’s Best Roofing a call at 386-263-7906!
Florida Best Roofing
Roofing Blog

Roof Estimate vs Roof Inspection

If you have ever found damage to your roof, bought or sold a house, dealt with a roofing contractor, or even bought or changed a property insurance policy you probably heard the terms roof estimate and roof inspection. Some people think that these terms are interchangeable, but they actually refer to two different processes. While both services are offered by reputable roofing contractors, they each involve different procedures and separate results. There are also separate situations that call for either a roof estimate or roof inspection. The information below will explain these differences to you and help you make the decision between a roof estimate and a roof inspection when it comes time to deal with your roof.


Roof Estimate

If you have ever seen an advertisement for a roofing contractor, whether on a billboard, the side of a truck, a tv commercial, a newspaper, a postcard, or anywhere else, you have probably seen the words “free estimate.” Almost all reputable roofing contractors provide free estimates as part of their marketing strategy. These are essentially a bid that the contractor offers for performing work on the roof ranging from a small targeted repair to full roof replacement. Just because estimates are part of a marketing strategy does not mean that they are frivolous or worthless. They are absolutely necessary before any work on the roof can begin. In fact, when you want roof repair or replacement it is recommended that you get an estimate, again usually free, from several reputable contractors in order to make the best decision for your home and your budget. 

A roof estimate is targeted. The process gets started with a call from the homeowner to a roofing contractor and a request for either a repair or a replacement estimate. Usually there is a reason behind this call, such as a leak or visible damage on the roof. Once the call is made, the contractor most likely will schedule an appointment with the homeowner for a company representative to come out and take a look at the roof and the damage. Occasionally, roof replacement estimates may be given without anyone actually going up on the roof, using satellite imagery, but most often contractors like to take a look at what they will be dealing with. During the appointment, the roofing contractor’s representative will evaluate the roof and the damage and make an educated guess, based on material/labor costs and previous experience as to what it will cost to fix the problem or replace the roof. This is why it is called an “estimate.” The amount estimated is liable to change based on what is actually encountered by the roofers once they begin work. There may be hidden damages that are not visible until the uppermost material is removed. For this reason, the estimate provided by a reputable roofing contractor will most often have language in it that names instances in which the final price may change. 


Roof Inspection

Now that you know what an estimate entails, let’s talk about what a roof inspection involves. A roof inspection, unlike a targeted estimate, is a full analysis of the whole roof system, including the rafters, the decking, and the roof covering. The inspector goes up on the roof to check all the pieces including the main covering (shingles, tile, metal) as well as other components like the vents, gutters, drip edge, and flashing. The inspector will also go up in the attic to check the wood that supports the roof and the roof deck that supports the covering. They also check for leaks on the interior ceilings. All materials are evaluated for efficacy, damages, and longevity. A roof inspection will detail any issues that your roof may have, potential issues that may arise, and how long the roof is expected to last. Unlike an estimate, a roof inspection typically does not provide a price for work to be done; instead, it details what work should be done for which you may want to get an estimate (or several estimates) in the future. 

Inspections are most often performed before a house is sold, either by the buyer or the seller. They are also performed by insurance companies before granting a policy or when making policy changes. Finally, roof inspections are a good maintenance tool. Getting routine roof inspections, every two to three years, will keep you apprised of any potential problems and may save on repair or replacement costs in the future. Roof inspections can be performed by a roofing contractor or a professional property inspector or even an insurance adjuster. Because inspections do not involve actual work being performed on the roof and do not guarantee that work will be performed, they can be done by someone with knowledge of construction and roofing but without a roofing license. Unless the inspection is paid for by an insurance company, it will most likely cost you, usually somewhere around $100.00. The reason for this is that an inspection is more exhaustive than an estimate and it does not make an offer of future work to be performed. 

To recap, an estimate is usually a free service provided by roofing contractors which targets a specific problem area or the whole roof replacement and provides the customer with the estimated cost that it will take to fix the problem or replace the roof entirely. An inspection is an exhaustive look at the roof which identifies all existing and potential future problems, as well as the longevity of the roof. It is performed by a professional, costs money, and can influence a house’s sale price as well as insurance coverage and premiums. 

If you have any questions about roof estimates and inspections or want an inspection or a free estimate for your roof in the Palm Coast, Flagler, or Volusia area, please give Florida’s Best Roofing a call at 386-263-7906!

Roof Repair
Roofing Blog

The Step-by-Step Process of Roof Repair

It may surprise you that roof repair is more than just laying down shingle to cover damaged areas. It is a process reflecting the investment you make in your property, and one which any homeowner will eventually have to deal with. For these reasons it is important that you make yourself familiar with what goes into roof repairs and the decisions that must be made. Whether you plan on making the repairs yourself or hiring a professional roofing contractor, it will benefit you to know what this process entails. Below we detail what goes into roof repairs from start to finish:


Equipment and Materials

Any reputable professional roofer is sure to have all required materials and equipment to do a proper roof repair. If you have an immediate need to make repairs and cannot wait on a contractor, it may interest you to know what exactly these materials and equipment include. Even if you plan to hire professional help, it is always good to stay informed and have a grasp of what it takes to complete a proper roof repair. 

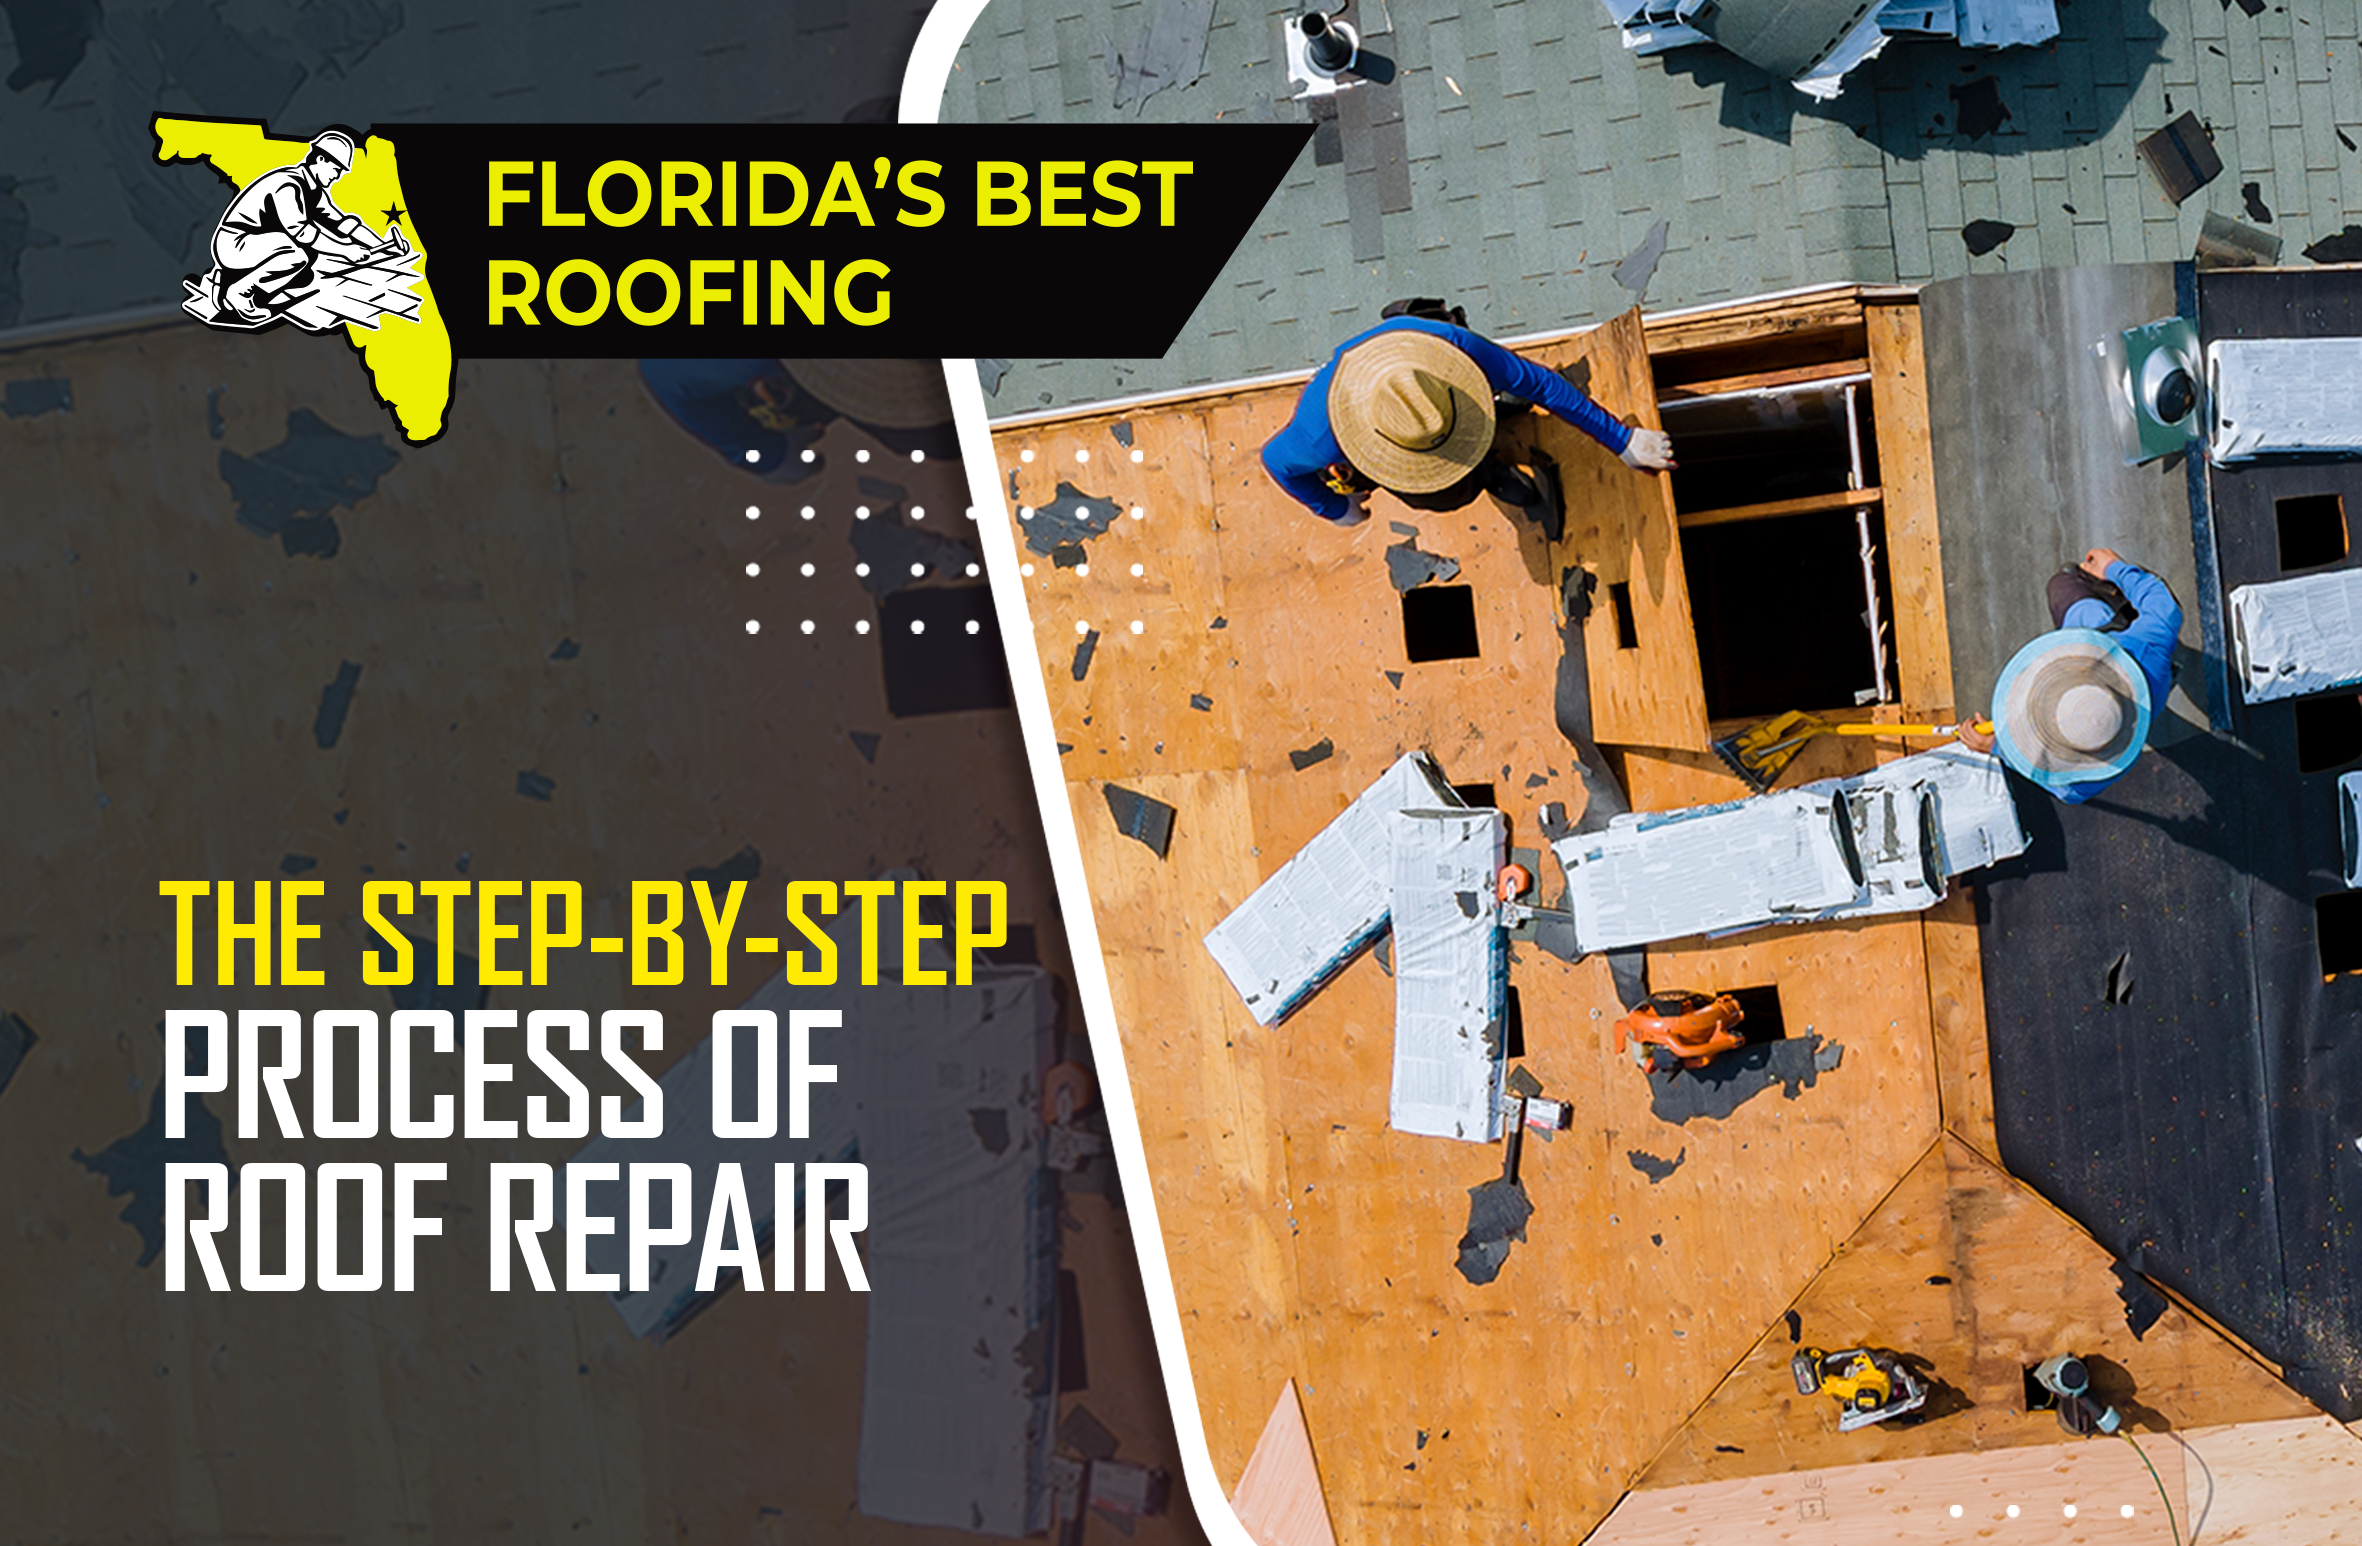
First, a good ladder is needed to get up on the roof. A shingle lift helps with delivery of materials, but is not something a DIY repairman may have on hand. Next, it is extremely important to have safety equipment or a fall protection kit, which typically includes rope, a safety harness, and roofing anchor. Roofing can be dangerous work and anyone going up on a roof needs to be prepared in order to avoid accidents.

Tools are required for removal of damaged material and installation of new material. These can include roofing nails, a hammer or nail gun, sealant, a utility knife, chalk, and a crowbar or putty knife. Finally, the new material to be installed is not only shingles, but also may include plywood, underlayment, flashing, vents, and drip edge.

Not all of these items are required for all roofing repairs; at the same time, more complicated repairs may require special equipment or materials. It is always recommended to hire a professional contractor to make this determination. If this is not possible in your situation, you should at least consult a roofer, roofing inspector, or other roofing professional to assess your situation and make sure that nothing is overlooked.


The Extent of Repairs

The first step in undertaking a repair is to determine the extent of repairs needed. Even more basically, the question to ask is whether the roof can be repaired or does it need full replacement? Below is some advice on how you may be able to make this determination yourself; however, it is always best to get the opinion of a professional. Most reputable roofing companies offer free estimates, and it is a good idea to take advantage of this and consult with one or several contractors.

Here are some signs that a repair will suffice, provided that the rest of the roofing system is in decent working condition:

Missing shingles: A few missing shingles can typically be replaced fairly easily. This must be done ASAP since missing shingles make the underlayment and decking vulnerable to the elements. If the roof is older, over 15 years old, then even a few missing shingles may warrant roof replacement due to the brittleness (breakability) of the adjoining shingles.

Cracked or Torn Shingles: Unless this condition is widespread across the whole roof, these can often be replaced individually. Occasionally, the existing cracked or torn shingles can be mended with sealant.

Broken Shingles: Shingles with pieces broken off no longer function as they should and allow the elements to penetrate to the underlayment and decking. Shingles that are missing pieces must be replaced.

Conversely, these are signs that a repair will not be sufficient and the whole roof should be replaced:

Signs of Aging: A roof with extensive signs of aging should ideally be inspected for damage and in many cases replaced. These signs include sagging, mold growth, discolored roofing, sitting water, and loose (flapping) shingles.

Curling: When shingles curl and you see the slope start to take on a wavy shape, this means that the shingles are past their life expectancy and are no longer fulfilling their function.

Granule Loss: Granules, the rough sandy bits covering asphalt shingles, provide UV and water protection. If shingles have lost their granules with age or due to weather they must all be replaced.


Steps to Roof Repair

After determining the required extent of repairs and getting together necessary equipment and materials, the repair process can commence. Here are the steps to that process:

Inspection: This is a three step process. The initial inspection determines the extent of necessary repairs and materials required for those repairs. A secondary inspection occurs when the damaged material is removed in order to determine if the decking is still intact or if this too needs to be replaced/repaired. The final inspection occurs after all repairs are done in order to make sure that all repairs were performed properly and the roof functions as it should.

Protection: This comes in the concrete and the abstract. One method of protection is a tarp that safeguards your roof before repairs begin and while they are taking place. Another is a dumpster trailer which will allow for disposal and prevent litter in the yard (this is typically provided by the contractor, if you choose to hire one). Finally, if you do hire a contractor make sure that they have a valid license and insurance and a clear contract for you to sign ensuring your legal protections.

Tear-Off: Old or damaged shingles and underlayment must be torn off to make room for new material and to allow you and the contractor to inspect the roof decking for damages. This can affect a small area for a small repair or the whole roof for roof replacement.

Prep: The roof must be prepared for new shingles. The decking is inspected and replaced where needed. The decking is also renailed up to current building codes. Then, underlayment is installed across the affected area along with any necessary new vents, flashing, valley metal, drip edge, etc.

Shingle Installation: Once the roof is prepped and thoroughly checked for any issues, it is ready for the new material. New shingles are laid down according to their type and manufacturers’ requirements. In the case of a repair, they are integrated into the existing roofing system.

Clean Up and Final: At the end the site is cleaned up of all debris and the property is checked for any loose material, such as nails. The dumpster trailer is also removed. In the case of a very large repair or roof replacement an inspector from the county or city building department is then sent out to make sure everything was installed and will function optimally.

It is important to be informed on the roof repair process no matter the scale of your repairs, from a couple missing shingles to full roof replacement. If you have any questions about a roof repair or the condition of your roof in the Palm Coast, Flagler, or Volusia area, please give Florida’s Best Roofing a call at 386-263-7906!
Insurance Estimate
Roofing Blog

Should I Share My Insurance Estimate With My Contractor?

If your roof was damaged during a storm, a frequent occurrence around these parts, then you may have turned to your home insurance company for help. After the claim is filed and the adjuster makes his inspection, you receive an estimate from your insurance company that details the repairs that need to be done and how much the insurance carrier will pay for them. At this point you are probably looking into hiring a contractor, and wondering whether you should share that insurance estimate with the roofing contractors that you are looking into. Some people fear that revealing their insurance estimate to contractors may allow a non-reputable contractor to take advantage of them or to raise their prices. So what should be done in this situation? Here are some things you should know:

Believe it or not, most roofers are on your side. Reputable, licensed roofing companies want to do what is best for their customers. Established local companies are looking to make their customers happy to stay in business and get referrals. A good roofer will be able to look at an insurance estimate and determine whether it is a fair representation of what it will take to fix all the damage on the roof. Because good contractors give warranties, they will not do a partial repair just to have to come back again later. 

Roofers can find damage that an adjuster may have missed when surveying the property. The first response you get from the insurance company and the scope of loss that accompanies it is not necessarily the final statement on the claim. Claims can be supplemented by contractors with a second or even third estimate if it is found that further work is required to fully repair the damage and return your property to its pre-storm condition.

There is really no reason that a contractor would use your insurance estimate against you. Reputable contractors will work with you and your insurance company to make sure you are treated fairly. If, however, a contractor asks for an immediate deposit after seeing your estimate, there may be some concerns. In this case it is advisable to get a second or third opinion. You always have the option to choose your contractor and change contractors before you sign a contract. 

Problems on a claim can arise because while the homeowner feels that the insurance company should cover all required repairs and renovations, the goal of the insurance company is to pay out as little as possible. For this reason, every homeowner should hire a reputable contractor who can accurately assess damages and prove to the insurance company that these damages must be covered in the claim. A good roofing contractor will be able to guide you through the claim process, supplement the original insurance response as necessary, and apply all relevant state statutes and building codes so that you are offered a fair assessment of what it will take to repair or replace your roof and get it up to code.

During the claims process, a field adjuster inspects your roof and a desk adjuster decides the payout. They often follow a standard template provided by their company, but not all roofs are the same. Some roofs have features that others lack. Building codes vary by state, county, and city. Codes are also updated every few years. Contractors keep up to date on codes in their local areas because they need their work to pass inspections by city or county officials. Since adjusters are not roof installers, it is important to have a roof contractor review your estimate to make sure that the adjusters did not miss any roof features or roof damages. They will also be able to see if the estimate created by the insurance company takes into account all applicable building codes. 

It is also important that your contractor reviews not just your insurance estimate but also your policy and all relevant documents. Some policies impose time limitations on roofing repairs, some do not include code upgrades, and all policies require mitigation of any further damage. Some policies include Actual Cash Value (ACV) provisions which issue only partial coverage for roof replacement or repairs. A good roofer will be able to foresee any issues that may arise out of the type of coverage you have and advise you properly on what to expect.

At Florida’s Best Roofing we are very knowledgeable about the insurance claims process and how to get a fair and honest estimate from your insurer. We will help guide you through the process. If you have any questions about the condition of your roof or your insurance estimate in the Palm Coast, Flagler, or Volusia area, please give Florida’s Best Roofing a call at 386-263-7906!

What Affects Property Market Value?
Roofing Blog

What Affects Property Market Value?

Whether you are considering selling or buying a house it is important to know what factors go into determining a property’s market value. Homeowners love to see their property appreciate in value, and whether selling or not, it is wise for them to take into account how they can affect this. Buyers in the meantime need to know which factors to check when considering purchasing a property, to make sure that it is valued correctly. While values are influenced by the ebb and flow of the real estate market, they are also partially determined by the factors we consider below.

Size and Usable Space

The price of most residential properties, whether a single family house or multiple occupation unit, is calculated by square foot. That is, if a 2,000 square foot home is sold for $200,000.00 then its price per square foot is $150.00. This price per square foot fluctuates according to market conditions and certain aspects of the property. Depending on the conditions referenced below, a price of $150.00 per square foot may be a great deal or a complete ripoff. 

One thing to consider is that price per square foot only applies to what is called usable space. This usable space is the area of the property that is livable and does not include features such as garages, unfinished attics, or unfinished porches/other exterior areas. While a garage may add value to a house, its square footage will not be included in the calculation of the price. In other words, the garage as a feature may raise the price per square foot, but for a 2,000 square foot property with a 450 square foot garage, the price per square foot will still be multiplied by 2,000 and not 2,450. For this reason, it may be beneficial to convert any unfinished areas of a property into usable space before selling. 

 Location

Location is hugely important in bestowing value upon a property. You may have noticed that property values in cities across the country have ballooned in recent years. One of the reasons for this is that as an area gets more urbanized it offers more opportunities for jobs and career development, which draws in potential buyers. As demand then increases, the value of the limited supply rises. On the other hand, if a major employer in an area closes or goes out of business, the property values in the area may drop since the wave of people moving out will raise supply at the same time as demand diminishes. 

Then again, within the same city or town there will likely be districts or areas with higher property values and others with lower. In one area houses may be priced in the millions while just a short distance away they may be less than half of that. There are several factors that affect this. In our area here in Florida one of the biggest such factors is distance to water. Houses with direct beach access are especially pricey as well as those situated on a canal. Other factors include distance to school and school quality, distance to commercial centers, shopping, and recreation. 

The value of a property zoned in a residential area close to great schools and a thriving business community will appreciate faster than others. While these factors are largely outside of homeowner’s control, they are important to consider when buying a property or determining sale value.

Comparable Homes

One way that property value is calculated for a house going on the market is to look at other houses for sale or sold in the area. These are called “comps” and can be helpful, but they must be considered appropriately. Applicable comps must be sold or for sale in the same time period, they must be in the same area, and must feature similarities in architectural style, number of rooms, property acreage, age, and features such as a finished porch or pool. It is usually advisable to consult a real estate agent before determining which comps are applicable. 

Home Condition and Renovations

New and newer homes typically sell for higher prices. This is because as a house ages, certain aspects–like the roof, the electrical system, plumbing, etc–may lose efficacy and need repair or replacement. The current condition of the home is the final factor that we will discuss in relation to value. Critical components of a property can deteriorate over time and must be inspected prior to buying or selling. 

The following should be inspected before a house is appraised to be put on the market: windows and doors, the roof, the HVAC system, and the wood (in case there is any rot or pest damage). If anything is found damaged or lacking, repairs should be done or even full system replacement. Upgrades, such as replacing the roof with higher quality shingles, can even increase a property’s appraised value. Interior renovations, such as painting the walls and replacing flooring can also go a long way. Finally, the property must be made presentable to the eyes of the buyer. A clean and aesthetically pleasing property will sell more quickly and at a higher price. 

While many of the aspects discussed above are outside homeowner’s control, it is important to keep in mind how they affect the price. It is also necessary to take care of the factors that are able to be controlled, such as the condition of a property and its curb appeal. If you have any questions about the condition of your roof or need roof repair or replacement in the Palm Coast, Flagler, or Volusia area, please give Florida’s Best Roofing a call and schedule a free estimate at 386-263-7906!


Shingle Roof Replacement
Roofing Blog

When Should a Shingle Roof Be Replaced?

Asphalt shingles are the most popular roofing material in our area. They are fairly cheap and durable, providing both protection and aesthetics. Still, nothing lasts forever and it is important to keep an eye on something that is so essential to the integrity of your home or property. At some point, any roof may look worn out, old or show other signs that it is time to replace the asphalt shingles. Here we will tell you what to look out for so that you may avoid problems such as extensive water damage or even mold problems in the future. Take a look below so you may recognize the signs that you should have your roof repaired or inspected:

General Lifespan of Asphalt Shingles

The life expectancy of asphalt shingles varies based on their style or type. All asphalt shingles are made of the same materials, mainly asphalt and crushed fiberglass, but sometimes they are made differently. They vary in the number of layers, how these are arranged, and manufacturers’ specific formulas, which can affect the longevity and durability of the shingles.

Generally, 3-tab shingles, the most common type of shingle in use 10-15 years ago, can last up to 20 years but most often wear down within 10-15 years. Laminate, architectural, or dimensional, shingles generally are given a warranty of 30-50 years. With the appropriate maintenance these generally last between 20-40 years, but this can vary based on weather events, especially in a hurricane and tropical storm prone area. 

Signs That Roof Replacement May Be Necessary

Even taking into account shingle manufacturers’ warranties and the durability of modern roofing materials, there are many reasons that a roof may start to fail prematurely. While regular maintenance is helpful, it is also necessary to look for small signs of trouble before they turn into big problems. Exposure to the elements, like sun, wind, rain, hail, and cycles of freeze and thaw can damage asphalt shingles all at once or over time. Falling debris, such as tree branches, can also inflict damage or wear off granules, as can critters.

You will doubtless notice some wear and tear due to the elements, such as fading colors and the loss of that “new” look. Here are some other signs to watch for in order to forestall leaks before they happen.  

Curling, Cracked, or Torn Shingles

Look out for cracked or torn shingles, or those that are loose and no longer stuck to the roof. These may even be creased. In this state the shingles are no longer a protective barrier on a roof and allow moisture to enter below to the underlayment. While the underlayment–depending on its type–will prevent leaks for a time, repeated and prolonged water saturation of the underlayment will eventually cause rot in the plywood sheathing and leaks in the house. The causes of this are many: bad ventilation, installation errors, weather damage, and others, but the result is always the same.

Missing Granules

Granules are the rough material that covers the top of the asphalt shingles. They are made of crushed stone and are essential to the shingles’ function. They protect against the sun, against water, increase fire safety, and help regulate temperature. Without granules, shingles lose their function leading to higher utility bills and leaks. If you see granules in your gutters or around the downspout, or if you see black spots on your roof where the fiberglass is exposed, you need to replace your shingles.

Moss and Rot

Moss naturally grows in humid environments like those in Florida. You will probably see moss on your roof after a couple of years, especially around vent areas. This does not mean that the roof needs immediate replacement. Often, moss can be removed by qualified professionals who clean roofs. If left to grow unchecked, however, moss can grow in abundance and damage the integrity of the roof by separating the shingles from the underlayment. It can also lead to rot in the wood sheathing. At this point replacement or repairs would be necessary. 

Missing or Blown-off Shingles

Heat can cause nail pops, and shingles can be blown off by strong winds or falling debris. Missing shingles need to be replaced as soon as possible, as this clearly indicates that the roof is now exposed to moisture. This problem is easy to spot, as the areas of missing shingles are most often clearly visible from the ground and sometimes you can even find those shingles in your yard. If you notice this, contact a licensed roofing specialist for a roof repair.

Old Appearance

You will know old roof shingles when you see them—discolored, flattened, smooth, and drab. This not only affects curb appeal, it also endangers your roof. Old shingles cannot do their job efficiently, meaning that every time there is a storm, water could be pooling beneath the old shingles or sitting still.

If your shingles start looking aged, it is time to replace them.

 If you have any questions about the integrity of your shingles or need any work done on your roof in the Palm Coast, Flagler, or Volusia area, please give Florida’s Best Roofing, Inc. a call and schedule a free estimate at 386-263-7906!

The Basics of Flat Roofs
Roofing Blog

What do you know about the Basics of Flat Roofs?

Flat roofs are most commonly found on commercial structures and in urban areas. While no roof should be truly flat, very very low sloped roofs, referred to as flat roofs, are different from the peaked roofs we most often discuss. Because of their low slope, water cannot quite drain as well on its own and special drainage systems must be installed. The materials used for a flat roof also differ from those that are used for peaked roofs. These materials are better able to handle water that does not drain as quickly as it would off of a peaked roof.

Flat roofs are covered with membrane roof systems. Before this is done, however, often a taper system is applied to the roof to ensure positive drainage: that water will drain away and off the roof, instead of pooling on the roof surface. A slope of no less than ¼ inch per foot is recommended for flat roofs. The taper system uses insulation sheets to create a slope carrying water from areas further away toward drains. 

There are several types of drains used for flat roofs. If the roof does not have any sort of boundary around the edges, it can be tapered to drain into gutters (preferably) around the edges. Often, however, flat roofs may have some sort of boundary around the edges which prevent drainage. This is referred to as the perimeter wall or parapet wall. In this case drains must be installed on the roof itself. In this case the water drains through pipes running through the building interior and the roof must be tapered from the edges to the drain. Multiple such drains may be required on larger roofs. 

When a roof with a parapet wall is covered by membrane, the membrane runs across the roof surface and up the wall. The corner between the wall and roof surface is softened with a cant strip. The top of the wall is flashed in such a way that the membrane stays in place and water does not enter beneath the membrane. Parapet walls also require back-up drainage systems, in case the internal drains ever get clogged. These are cut through the parapet walls two inches above the level of the primary drain and are called scuppers. They prevent water accumulating above two inches if the primary drains fail. Otherwise, the roof may collapse from the water weight. Rarely, usually on older roofs, scuppers may be installed at the deck line and act as primary drainage, in which case the roof would be tapered toward them. 

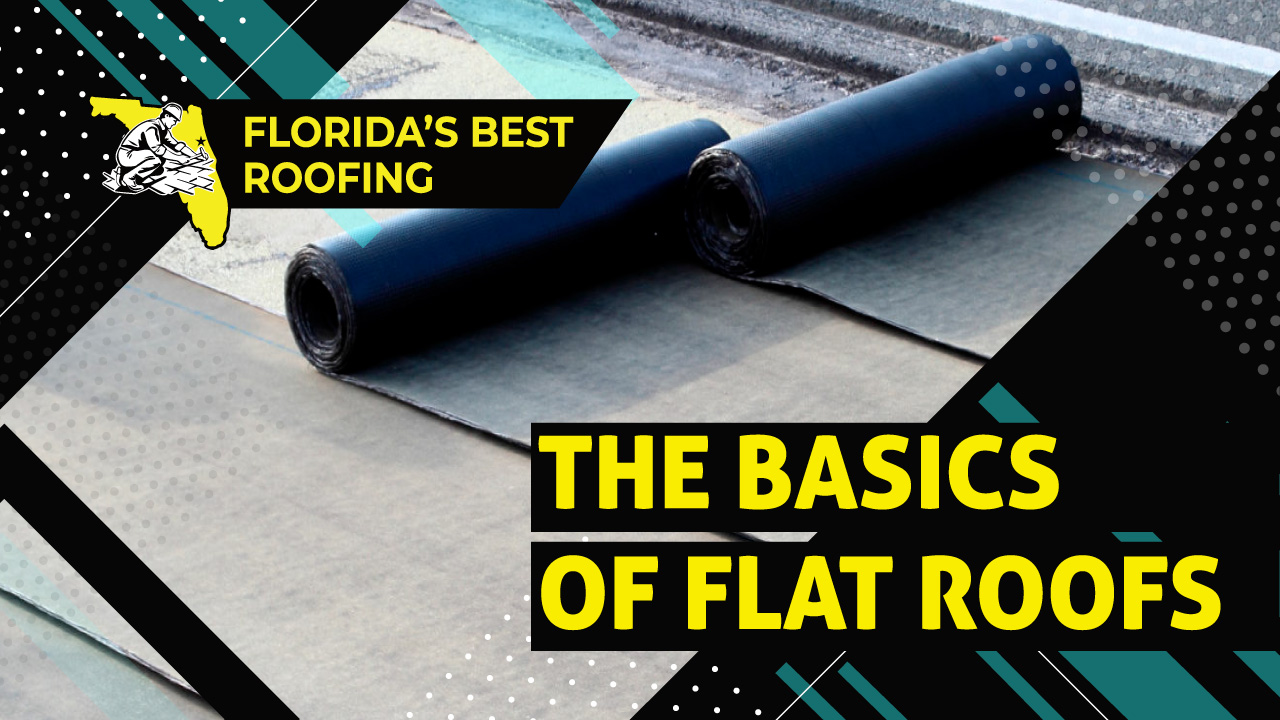
There are two classes of membrane systems: single membrane and multiple-ply membranes. Multi-ply membrane roofs are made of rolled materials bonded with an asphalt bonding agent. These are usually called built up or hot tar roofs. The first layer that sits directly on the roof deck is the base sheet. It must stand up to pulling and tugging forces which may cause wear and tear as the roof decking expands and contracts with temperature and moisture changes. The sheet that is exposed to the elements at the top is called the cap sheet. It must resist the sun and weather. The sheets in the middle between the cap and base are the ply sheets. The number of plys (interior layers) determines the quality and cost of the roof, with more being better and more expensive. Three and five ply systems are common. 

In installation, the base sheet is usually nailed to the roof decking. Adjoining strips are placed so that they overlap at the edges on every level. Hot tar is mopped over and between the plys and cap sheet, which seals the sheets together. Alternatively, in recent years self-sticking membrane sheets have begun to replace the hot tar method in some areas. There are three types of cap sheet. The first type is called mineral, and it is very similar to the coating of asphalt shingles. The second type is called smooth: this is an asphalt flood coat, which must be painted with reflective coating to prevent sun damage. The last type of cap is the aggregate finish where gravel is spread over the flood coat to protect it from the sun. As this gravel can also act as a way of weighing down the roof and holding it in place, it is called ballast. 

Next we discuss single ply membrane roof systems. The two most common are modified bitumen and elastomeric. Both of these must be fastened with screws or nails or adhesive to the roof decking. The finish must resist breakdown from sun and weather. 

Modified bitumen is made of asphalt or coal tar pitch with added plasticizers that make the material flexible. First, a base sheet is placed and fastened. Then, the modified bitumen is laid on top by one of two primary methods: hot mop (SBS) or torch down (APP). The modified bitumen either has a mineral facing or it is unfinished, in which case it must be covered with smooth stone aggregate. A coat of reflective paint is also an option. APP can be painted directly, but SBS needs a flood coat before painting. 

Elastomeric membranes are made from plastic (PVC) or synthetic rubber (EPDM). There are usually three layers that are bonded in a single sheet during the manufacturing process. If not ballasted, they must be mechanically fastened with nails or screws or glued to the decking. If ballasted, these systems are only fastened at the edges and held down by ballast. Adhesive cannot be asphalt or coal tar pitch, as it breaks down the material. Insulation cushions PVC and is covered by a fabric or paper slip sheet to prevent damage as the plastic shifts. Both systems are glued or fastened at the seams. While EPDM uses chemical glue, PVC is heated-welded by a special machine. Smooth stone ballast may be placed on top of either PVC or EPDM systems.

If you have any questions about flat roofs or need any work done on your roof in the Palm Coast, Flagler, or Volusia area, please give Florida’s Best Roofing, Inc. a call and schedule a free estimate at 386-263-7906!

What is Below Shingles on a Roof?
Roofing Blog

Do you want to know what is Below Shingles on a Roof?

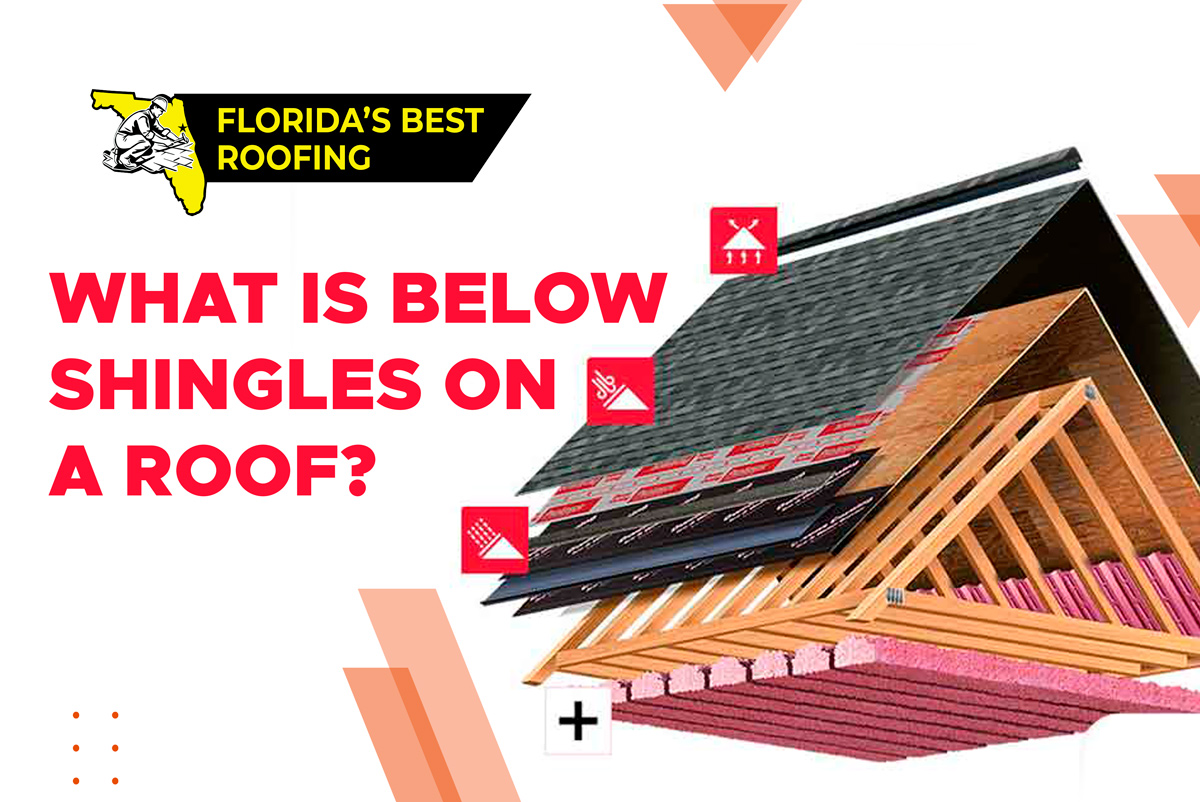
When you look at a roof what you notice first is its shape and the material, most often asphalt shingles, that covers it. Upon a closer look you may notice some vents and pipes, but besides that it is really impossible to see what the roof is really made of. Unless you see a roof being replaced or a new roof being installed, you may never know how many layers and types of materials are hidden underneath the shingles and really make up the roof beyond the visible materials.

In fact, there are several layers beneath the shingles that work to create the roof shape, support it, regulate temperature, insulate your home, and block out moisture. Knowing about what really makes up a roof can help you understand how it functions, how it can be damaged or protected, and help you in dealing with roofing issues on your property in the future.


Layers Under Roof Covering

Let’s go over the layers that make up a roof, starting from the bottom and heading up.


The Frame

The frame of the home is what gives it its shape and defines its boundaries. The frame of the roof creates its shape and the support for all covering material. The frames of modern homes are typically made of a series of wood trusses manufactured to the specifications of a particular blueprint or home design. Occasionally, roofs are built completely on-site with wooden beams cut to appropriate rafter size and put together on the structure. It is important to have an idea of what the finished roof will look like when creating the frame since frames for certain roofing materials, like clay or concrete tile or slate, require additional reinforcing in the frame to hold up their weight. 


Insulation

Insulation in a house helps to regulate the internal temperature of a structure and prevent its fluctuations during weather changes. It also aids in reducing the use and cost of heaters and air conditioners. In a finished attic, the insulation is placed between the rafters of the roof’s frame. In an unfinished attic, the insulation can usually be found on the attic floor. 


The Roof Deck

The roof deck is nailed on top of the roof frame. It is made of wooden boards, usually either plywood or another engineered wood product such as oriented particle board (OSB). This creates the roof’s surface on top of the trusses. Holes are cut in the roof deck at appropriate areas where roofing vents will eventually be installed.


Water Shield

A waterproof barrier or membrane that is designed to prevent build up of moisture or protect areas that are particularly susceptible to water damage is laid down next. This is typically a peel-and-stick membrane that is used to line all valleys on the roof and, in climates that have ice or snow in the winter, the perimeter around the eaves. The peel-and-stick membrane attaches directly to the roof’s deck.


Underlayment

Next, and directly below the roof covering, is the underlayment. There are several different kinds of underlayment, which we will go over below since they serve as an integral part of the roof, particularly in preventing water from reaching the roof deck and then causing leaks. Underlayment is usually made of fiberglass paper or felt, and it covers the entire roof. Depending on the type of underlayment, it is either nailed to the deck or sticks directly to it if it is self-adhesive. 

Underlayment is either water-resistant or waterproof. There are three kinds of underlayment: asphalt-saturated felt, non-bitumen synthetic underlayment, or rubberized asphalt underlayment.


Asphalt-Saturated Felt

Until about 15-20 years ago, this was the most common kind of underlayment. It is water-resistant and nailed down to the roof. It is commonly called tar or felt paper and can vary in thickness. It consists of a base material (wood, cellulose, polyester, or fiberglass) which is soaked in a protective coat of asphalt (bitumen) or a similar material.


Synthetic Underlayment

This is presently the most common type of underlayment used by contractors, although in hurricane-prone central Florida it is quickly being replaced by the hardier rubberized asphalt (discussed below). Compared to felt paper (above) synthetic underlayment has increased durability. Fiberglass is added when the synthetic material is coated in asphalt, resulting in increased resistance to tears and punctures. Still, synthetic underlayment is water-resistant and must be nailed down to the roof deck.


Rubberized Asphalt

This is the most expensive type of underlayment, which is presently growing in popularity, although it leads to a higher cost of roof replacement. Its expense comes from a higher amount of rubber and asphalt polymers in production, which contribute to its strength. This underlayment comes with an adhesive on one side. When the covering is peeled away this adhesive sticks directly to the roof deck and creates a waterproof seal, as no nailing is required. It is also called peel-and-seal. 

Once the chosen underlayment is in place, the roof covering is added, beginning with the shingle starter strip and drip-edge at the eaves, the vents and flashing in their designated spaces, and shingles (or other chosen covering material) across the entire roof. 

If you have any questions about roof underlayment or need any work done on your roof in the Palm Coast, Flagler, or Volusia area, please give Florida’s Best Roofing, Inc. a call and schedule a free estimate at 386-263-7906!

Warranty Can I Get
Roofing Blog

What Kind of Warranty Can I Get for a New Roof?

When you replace your roof with a new one you make a big investment, and naturally you want that investment to be protected. Large projects like roof replacement come with warranties. It is important to find out what kind of warranties are out there so you can make the best choices for yourself, your home, and your investment. For this reason, you should always look into the warranties offered by both material manufacturers and contractors before selecting a material for your new roof and the contractor who will install it. 

Whether you are purchasing a completely new home with a new roof or you are replacing your existing roof with a new one, your roof will likely come with a warranty (and if it does not, you may want to look into getting a second or third opinion from a different contractor). Roof related warranties are generally split into two types, and both of these types of warranty should come with every new roof or roof replacement. The first is the manufacturer’s warranty, and the second is the contractor’s warranty. They cover two different aspects of the roof: the materials used and the way they are installed. We will look deeper into both aspects below.


Manufacturers’ Warranties

A manufacturer’s warranty is so named because it is guaranteed and provided by the manufacturer of the material used to cover the new or replaced roof. As we have covered in previous posts, there are many different kinds of roofing material, the most common in central Florida being asphalt shingles, followed by tile and metal roofing materials. All of these come with different warranty periods, guaranteed by their manufacturers. 

Asphalt shingles warranties vary in length by type of shingle. Just a decade or two ago the principal type of asphalt shingle in use was the 3-tab shingle, which carried a warranty of 15-25 years depending on the manufacturer. Shingle manufacturing technology, however, is constantly improving. Nowadays, 3-tab shingles, the cheapest kind of shingle, carry a warranty of 30 years. But these are no longer the most common type of shingle used. Instead, we almost always use architectural shingles, which have an improved aesthetic and quality. These shingles come with a 40 year manufacturer’s warranty for the most basic sort and a limited lifetime warranty for the average grade. This warranty essentially translates into 50 years. The highest quality architectural shingles, also the most expensive sort, can carry warranties equal to the lifetime of the roof. Manufacturer’s warranties for asphalt shingles are typically transferable once in the case of property exchanging hands.

Limited lifetime manufacturer’s warranties are also typically guaranteed by tile and metal roofing material manufacturers. A typical explanation of the limited lifetime warranty in these cases is that they are in effect as long as the home remains owned by the same owner who replaced the roof (or purchased the home with a new roof). The good news is that if the home transfers ownership (that is, if you sell your house), the warranty is transferable! However, once transferred, the warranty remains in effect for a limited period, such as 40 or 50 years. 

Due to recent technological innovations, manufacturer’s asphalt shingle warranties are now typically equal in length to tile and metal roofing material manufacturer’s warranties. All of these manufacturers’ warranties cover specifically problems that may arise in the roofing material resulting from defects in the manufacturing process. Some examples of these include rapid granule or color loss in shingles (also color change). Splitting and cracking are signs of defects in metal or tile. These are only covered if the cause is manufacturing defect, not poor installation technique or external causes (such as a tree falling down on the roof). Weather events, such as wind or hail, that can damage new and replaced roofs are sometimes nowadays covered under manufacturers’ warranties, but with limitations in factors like wind speed. For example, the architectural shingles that we use at Florida’s Best Roofing, Inc. come with a manufacturer’s warranty against winds of up to 130 miles per hour. It is important to remember, however, that weather damages like wind and hail are also typically covered by property insurance policies, and losses can be recouped by filing a claim with your home insurance company. For more details on this, see our earlier post on this topic.

Another thing to keep in mind about manufacturers’ warranties is that it is important to register your new roof with the manufacturer of the roofing material. This will put the warranty into effect. If you have questions about how to do this, consult your contractor, as they likely deal with this process on a daily basis. 


Labor or Workmanship Warranties

This is the other side of the warranty coin. While manufacturers’ warranties cover new roof or roof replacement materials, labor or workmanship warranties cover installation. These warranties are provided by the contractor who replaces your roof or puts the roof on a new home. Their length varies by contractor, from 3 to 5 to 10 years, with ten years being the most common. Since it is the contractor who provides the warranty, it is typically only effective if the same contractor is called in to deal with a problem that may arise.

Contractors’ warranties usually cover the labor and material cost involved in repairing a roof under warranty if the repairs are made necessary by problems arising from errors made in the installation process when the new roof was installed or replaced. In the case that you have a roof under a labor or workmanship warranty and you notice a problem or leak, you should call the contractor who guaranteed the warranty to assess the damage and make the repairs. It is also important to note that some labor warranties do not cover material costs associated with repairs, so it is important to clarify what type of warranty you will be getting before signing a contract. 

We at Florida’s Best Roofing, Inc. offer a 10 year labor warranty on all our roof replacements. If you have any questions about roofing warranties or any other roofing needs in Flagler, Volusia, or St. Johns counties please call us at 386-263-7906 for a free estimate!

Roof Shingles
Roofing Blog

Roof Shingles: What they are and how they’re made

What are they?

Roof shingles are any roof covering that is made up of multiple overlapping elements. The overlap helps to prevent water from rain or snow from penetrating the roof surface. The elements–that is, the shingles–are generally flat rectangular shapes coursing up from the bottom edge of the roof up the slopes to the peak. The successive overlap covers the adjoining locations of the row below, thus preventing water from entering a sloped roof. Shingles can be made of many different materials, including wood, slate or other natural stone, metal, or composite elements, such as asphalt shingles. When the overlapping elements are ceramic or concrete, they are called tiles. Tile roofs are very popular in Europe, but less so in the United States, where the most common material is asphalt shingles. 


Asphalt Shingles

Fiberglass-based asphalt shingles are the most common roof covering for residential structures in the United States. This type of shingles are easy and relatively quick to install, they are affordable when compared with other roof coverings, and they can last twenty to fifty years depending on shingle style and climate. Asphalt shingles also come in a large variety of colors, which do not affect the cost, allowing homeowners to customize their roofs to fit their aesthetic.

The waterproofing and protection provided by asphalt shingles mainly results from long-chain petroleum hydrocarbons that are formed in the manufacturing process.


How Asphalt Shingles Are Made

Asphalt shingles are made at dedicated shingle manufacturing plants across the country by several different companies. Top tier roofing plants receive thousands of tons of raw and manufactured material daily. The materials are then transformed into high quality roofing materials with increasingly improving durability as the science behind shingle manufacturing continues in advancement.

Asphalt used at these manufacturing facilities is processed to meet strict quality guidelines, resulting in the creation of strong and flexible shapes. Quarried limestone, which arrives at the plants in the form of large stones, is crushed by specialized milling equipment into limestone powder. The limestone powder is mixed with asphalt to create a manufactured material called filled coating.

Fiberglass forms the center base of the shingles. Many thousands of yards of rolled fiberglass is rolled out into a coater where the filled coating is applied to both sides of the fiberglass at super-heated temperatures exceeding four hundred degrees Fahrenheit. Next, the granules–the rough, gritty surface of the shingles–is applied. Granules are created from ceramically coated fine, mined stones that are specifically sized for the process. The ceramic coating on the granules is what gives color to the shingle. Thus, a specific colored coating is selected for each color and style of shingle.

The asphalt coated fiberglass sheet is fed into a press which embeds the ceramically coated and colored granules. Then, the material is passed over a series of rolls while being sprayed with a fine mist of water, which cools down the material and seals the process. A strip of sealant is then added to the sheet to give additional wind protection to the shingles.

Specialized machines at the plants then slice the rolls into individual shingles which are stacked and packed into bundles. The bundles are packed onto palettes then shipped to suppliers’ warehouses across the country.

Whether you have a shingle roof or roofing of any other material, for all your roofing needs in Flagler, Palm Coast, Bunnell, Daytona Beach, and Deland call Florida’s Best Roofing Inc. at 386-263-7906 for a free estimate! 

Roof Ventilation
Roofing Blog

Roof Ventilation: Vent Types and Importance

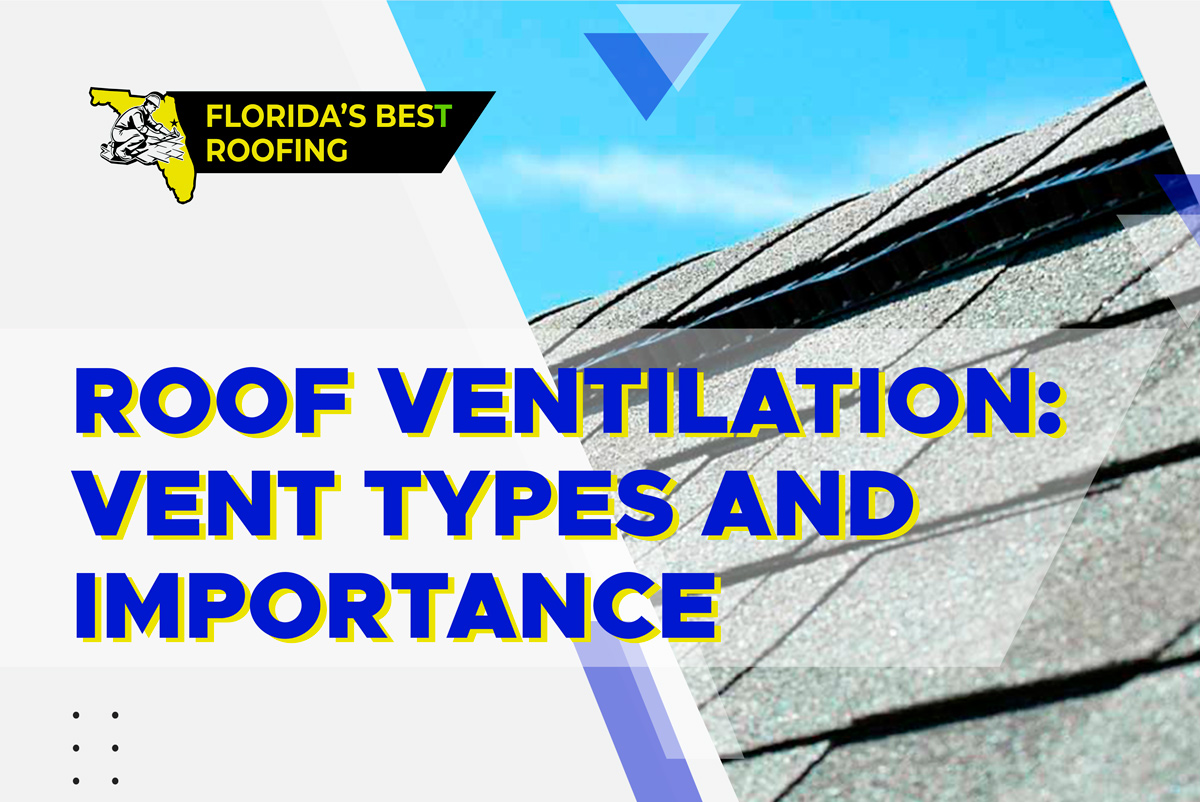
Why does a roof require vents? And why is it that roofs have different types of vents? Well, here we will go over the importance of roof ventilation, ventilation types, and the pros and cons of different types of vents.

Good ventilation systems extend the lifetime of the roof and can reduce the energy consumption and cost of the structure! There are two types of ventilation: exhaust (letting out stale air) and intake (bring in fresh air). Ideally, a roof will have both types of ventilation, but occasionally the architecture of the home will allow only for exhaust, but not intake. Although having both is best, just exhaust is better than nothing at all.

Why is exhaust ventilation important? This is because hot air rises and contains moisture. This is an issue in any climate, but especially in a warm one like what we have in Florida. If hot, moist air is allowed to stagnate in the attic, it will lead to mildew and mold problems which will compromise the wood framing and decking of the roof. To prevent this, exhaust vents are installed at the top of the roof, most often on the ridges, to release this hot air.

Why is intake ventilation important? It’s important because while hot air rises, it is helped if cooler air is taken in to push it up. Intake vents are installed along the eaves of the roof, usually in the soffit, to take in cool air and push the hot air up through the exhaust vents.

Unventilated or improperly ventilated roofs can lead to major, expensive problems such as poor indoor air quality, overburdened air conditioning systems, moisture in the attic space, and dry rot of roof sheathing. Although this is not a problem in Florida, in colder climates ice dams can also form on roofs in the winter months, straining the roof framing and wearing down the material covering the roof.

So what are the different types of vents? Well, there are 7 common types of exhaust vents and 4 types of intake vents. We will start with the exhaust.


Types of Exhaust Vents

Ridge Vents: These are the most common and effective type of exhaust vent. They are installed across the peak or ridge (hence the name) of a roof, allowing the rising hot air to exit out of the highest point. Ridge vents usually run across the entire peak of the roof, or even across multiple ridges, if the roof is large enough to have these. This allows for maximum surface area for the hot air to escape. Ridge vents are installed over a 2 inch gap that is cut in the roof decking at the peak of the roof. They come in two main types: aluminum and shingle-over.

Off Ridge Vents: These types of vents are smaller than ridge vents. They vary in size from 2 feet to 8 feet, but the most common type is 4 feet across. They are typically installed about one foot below the ridge line, after a hole the size of the vent is cut in the roof sheathing. While off ridge vents are not as effective in letting out the hottest air as ridge vents–because they sit below the very top of the roof and have a smaller surface area–they are often chosen for more complex roofs, roofs with short ridge lines, or as auxiliary exhaust venting on roofs that do also have ridge vents.

Box Vents: These are also called turtle vents, since their raised box shape somewhat resembles the shell on a turtle’s back. They are quite similar to off ridge vents and come with both the same drawbacks and advantages. The difference between the two mainly lies in the shape: off ridge vents are elongated, but box vents are square, usually sized 18 inches by 18 inches. These are typically installed in bunches on roofs with short ridges or as auxiliaries in areas of the roof that require ventilation but are not suitable for a ridge or off ridge vent.

Hard-Wired Powered Attic Vents: These are electric propelled fans that help to pull stale air out of the attic space. They are hard-wired into the home’s electrical system and rely on it for their function. There is some debate over the effectiveness of powered attic fans, but they do provide some exhaust ventilation. What is definitive is that their constant use of electricity does raise the home’s electric bill. Another issue is that in air-conditioned homes the powered fans can pull the cooler air from the house’s interior, which raises the AC costs.

Solar Powered Attic Vents: Solar powered attic vents are exactly like the hard wired power vents, except that they get their power solely from a solar panel attached to the vent. This removes the increased electricity cost, but does not eliminate other issues. Like the hard-wired power vents, they are often either too powerful or not powerful enough to function efficiently with the roof’s ventilation system.

Roof Turbines: This is a device that consists of aluminum blades within an aluminum cowl. The blades rotate due to wind movement and pull air from out of the attic and distribute it to the exterior. The upside is that they are eco-friendly and quiet even on very windy days. The downside is that because they are small, many would be needed to ventilate a whole roof. Additionally, they require winds of at least 5 or 6 mph to function properly, which means they provide no ventilation at all on still days.

Cupola Vents: Cupola vents are unique, rare, and expensive. They are, however, often quite beautiful and add to a home’s aesthetic. They were originally created to allow a lot of air into a barn to help dry hay and other crops. They act as both exhaust and intake. They come in many shapes and sizes and often feature quite elaborate decorative features. Another positive to cupola vents is that they allow more light into the home.


Types of Intake Vents

Soffit Vents: This is by far the most common and effective type of intake ventilation. Soffit vents are installed directly on the eaves of the roof (or the “roof overhang”) to provide continuous ventilation around the roof’s perimeter. Soffit is typically made of vinyl or aluminum and can be continuous or individual.

Gable Vents: These are usually round or triangular vents just below the peak of a roof’s gable. They function partially as intake and partially as exhaust vents in a horizontal cross-ventilation system where air flows in one side of the attic and out of the other. This is alright, but less effective than the vertical cross-ventilation of soffit and ridge vents.

Over Fascia Vents: These vents are placed at the top of the fascia board and below the first row of wood covering. They are less effective than soffit vents because the intake surface area is decreased; however, they are very useful in cases where the size of the eaves’ overhang does not allow for soffit venting.

Drip Edge Vents: These are very similar to over fascia vents. The only difference is placement, as they are either part of or added to the roof’s drip edge. The drip edge is a metal strip that is attached at the edge of the roof to direct water drainage off the side or into the gutters.

We hope this post has shown you the ins and outs of roofing ventilation. As always, for all your roofing needs in Flagler, Palm Coast, Bunnell, Daytona Beach, and Deland call Florida’s Best Roofing at 386-263-7906 for a free estimate!

Florida’s Best Roofing, Inc is a Palm Coast-based roofing contractor, providing professional roofing services in Flagler and Volusia County Areas.

Newsletter

We promise not to spam!